Please
follow the step-by-step instructions given below:
1. Create a New Profile (Named Subsystem) by cloning the existing Server Datasource Profile. (You can use the Siebel Copy Record feature to do that)
Refer: Siebel Bookshelf: Siebel System Administration Guide > Configuring Siebel Servers > Configuring the Siebel Enterprise Server >Creating Siebel Enterprise Server Named Subsystems
2. Enter the following values for the new profile:
Name
|
Value
|
Profile
|
Report Datasource
|
Alias
|
RptDataSrc
|
Subsystem Type
|
InfraDatasources
|
Description
|
Reports Datasource
used for BIP Reporting
|
3. In the Profile Parameters specify all the parameters same as the Server Datasource profile.
Name
|
Alias
|
Value
|
Chart Image Format
|
DSChartImageFormat
|
$(ChartImageFormat)
|
Chart Server
|
DSChartServer
|
$(ChartServer)
|
Database current SQLID
|
DSCurrentSQLID
|
$(CurrentSQLID)
|
Data source Connect
String
|
DSConnectString
|
<ODBC Connect
String>
|
DB Connector DLL
|
DSDLLName
|
<DB Connector DLL
Name> e.g. sscdms80
for MS SQL Server
|
Datasource Docked Flag
|
DSDockedFlg
|
True
|
Datasource Table Owner
|
DSTableOwner
|
<Table Owner
Name>
|
Click on the Advanced button and set the following parameters:
Name
|
Alias
|
Value
|
SQL Style
|
DSSQLStyle
|
<Sql Style>
e.g. MSSqlServer for Windows SQL Server |
Datasource Enterprise
Server
|
DSEnterpriseServer
|
<Enterprise Server
Name>
|
Datasource maximum
fetch array size
|
DSMaxFetchArraySize
|
-1
|
Click on the Hidden button and set the following parameters:
Name
|
Alias
|
Value
|
Datasource Gateway
Server
|
DSGatewayAddress
|
<siebelgatewayhostname>:2320
|
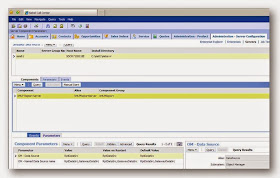
4. Navigate to the Administration - Server Configuration > Enterprises > Component Definitions view. Query for XMLP Report Server component.
5. Click on the pull down menu and select Start Reconfiguration.
6. In the Component Parameters list applet set following parameters:
Parameter
|
Value
|
OM - Data Source
|
RptDataSrc
|
OM - Named Data Source
name
|
RptDataSrc,GatewayDataSrc
|
7. Click on the pull down menu in the Component Definitions applet and select Commit Configuration.
8. Hit the Synchronize button under the Component Definitions.
9. Restart Siebel Server and Gateway Services.
10. Log into the Siebel CRM Application as Siebel Administrator and ensure that the XMLP Report Server component is 'Online'.
11. Verify that the new parameters are in effect:
- Navigate to Site Map > Administration
- Server Configuration > Servers > Components
- In the Component
Parameters list applet verify the following parameter values:
- OM - Data Source : RptDataSrc
- OM - Named Data Source name :
RptDataSrc,GatewayDataSrc
Report Scheduling and Large Data Volume
Siebel BI Publisher Reports Scheduling feature makes use of the EAI Object Manager to fetch the report data from Siebel by invoking the inbound web service named BIPDataService. For scheduled reports to run on large data sets, the EAI Object Manager component should also be configured to use the Reports Data Source (as mentioned above).
Follow the steps given below in case you are using the Siebel BI Publisher Reports Scheduling feature:
1. Log into Siebel CRM Application as Siebel Administrator.
2. Navigate to the Administration - Server Configuration > Enterprises > Component Definitions view.
3. Query for EAI Object Manager component.
4. Click on the pull down menu and select Start Reconfiguration.
5. In the Component Parameters list applet set following parameters:
Parameter
|
Value
|
OM - Data Source
|
RptDataSrc
|
OM - Named Data Source
name
|
RptDataSrc,GatewayDataSrc
|
6. Click on the pull down menu in the Component Definitions applet and select Commit Configuration.
7. Hit the Synchronize button under the Component Definitions.
8. Restart Siebel Server and Gateway Services.


No comments:
Post a Comment